Exercise
Standing yoga poses routine
This short sequence of standing yoga poses is designed to help you feel rooted to the ground, while using the breath to improve mental focus and promote a sense of calm. Standing postures build strength in the muscles of the legs, but are also great weight-bearing exercises. With this in mind, they’re fantastic for building bone strength too.
Finding a sense of grounding helps us to feel more settled – both in our body and mind. It also helps to improve our mental focus, helping us stay in the present and keep our thoughts under control.
Use this sequence on its own (remembering to repeat on both sides of the body), or tag onto the end of a gentle sun salute for a longer routine.
This sequence is only a guide. If something doesn’t feel right or causes you pain, come out of the pose.
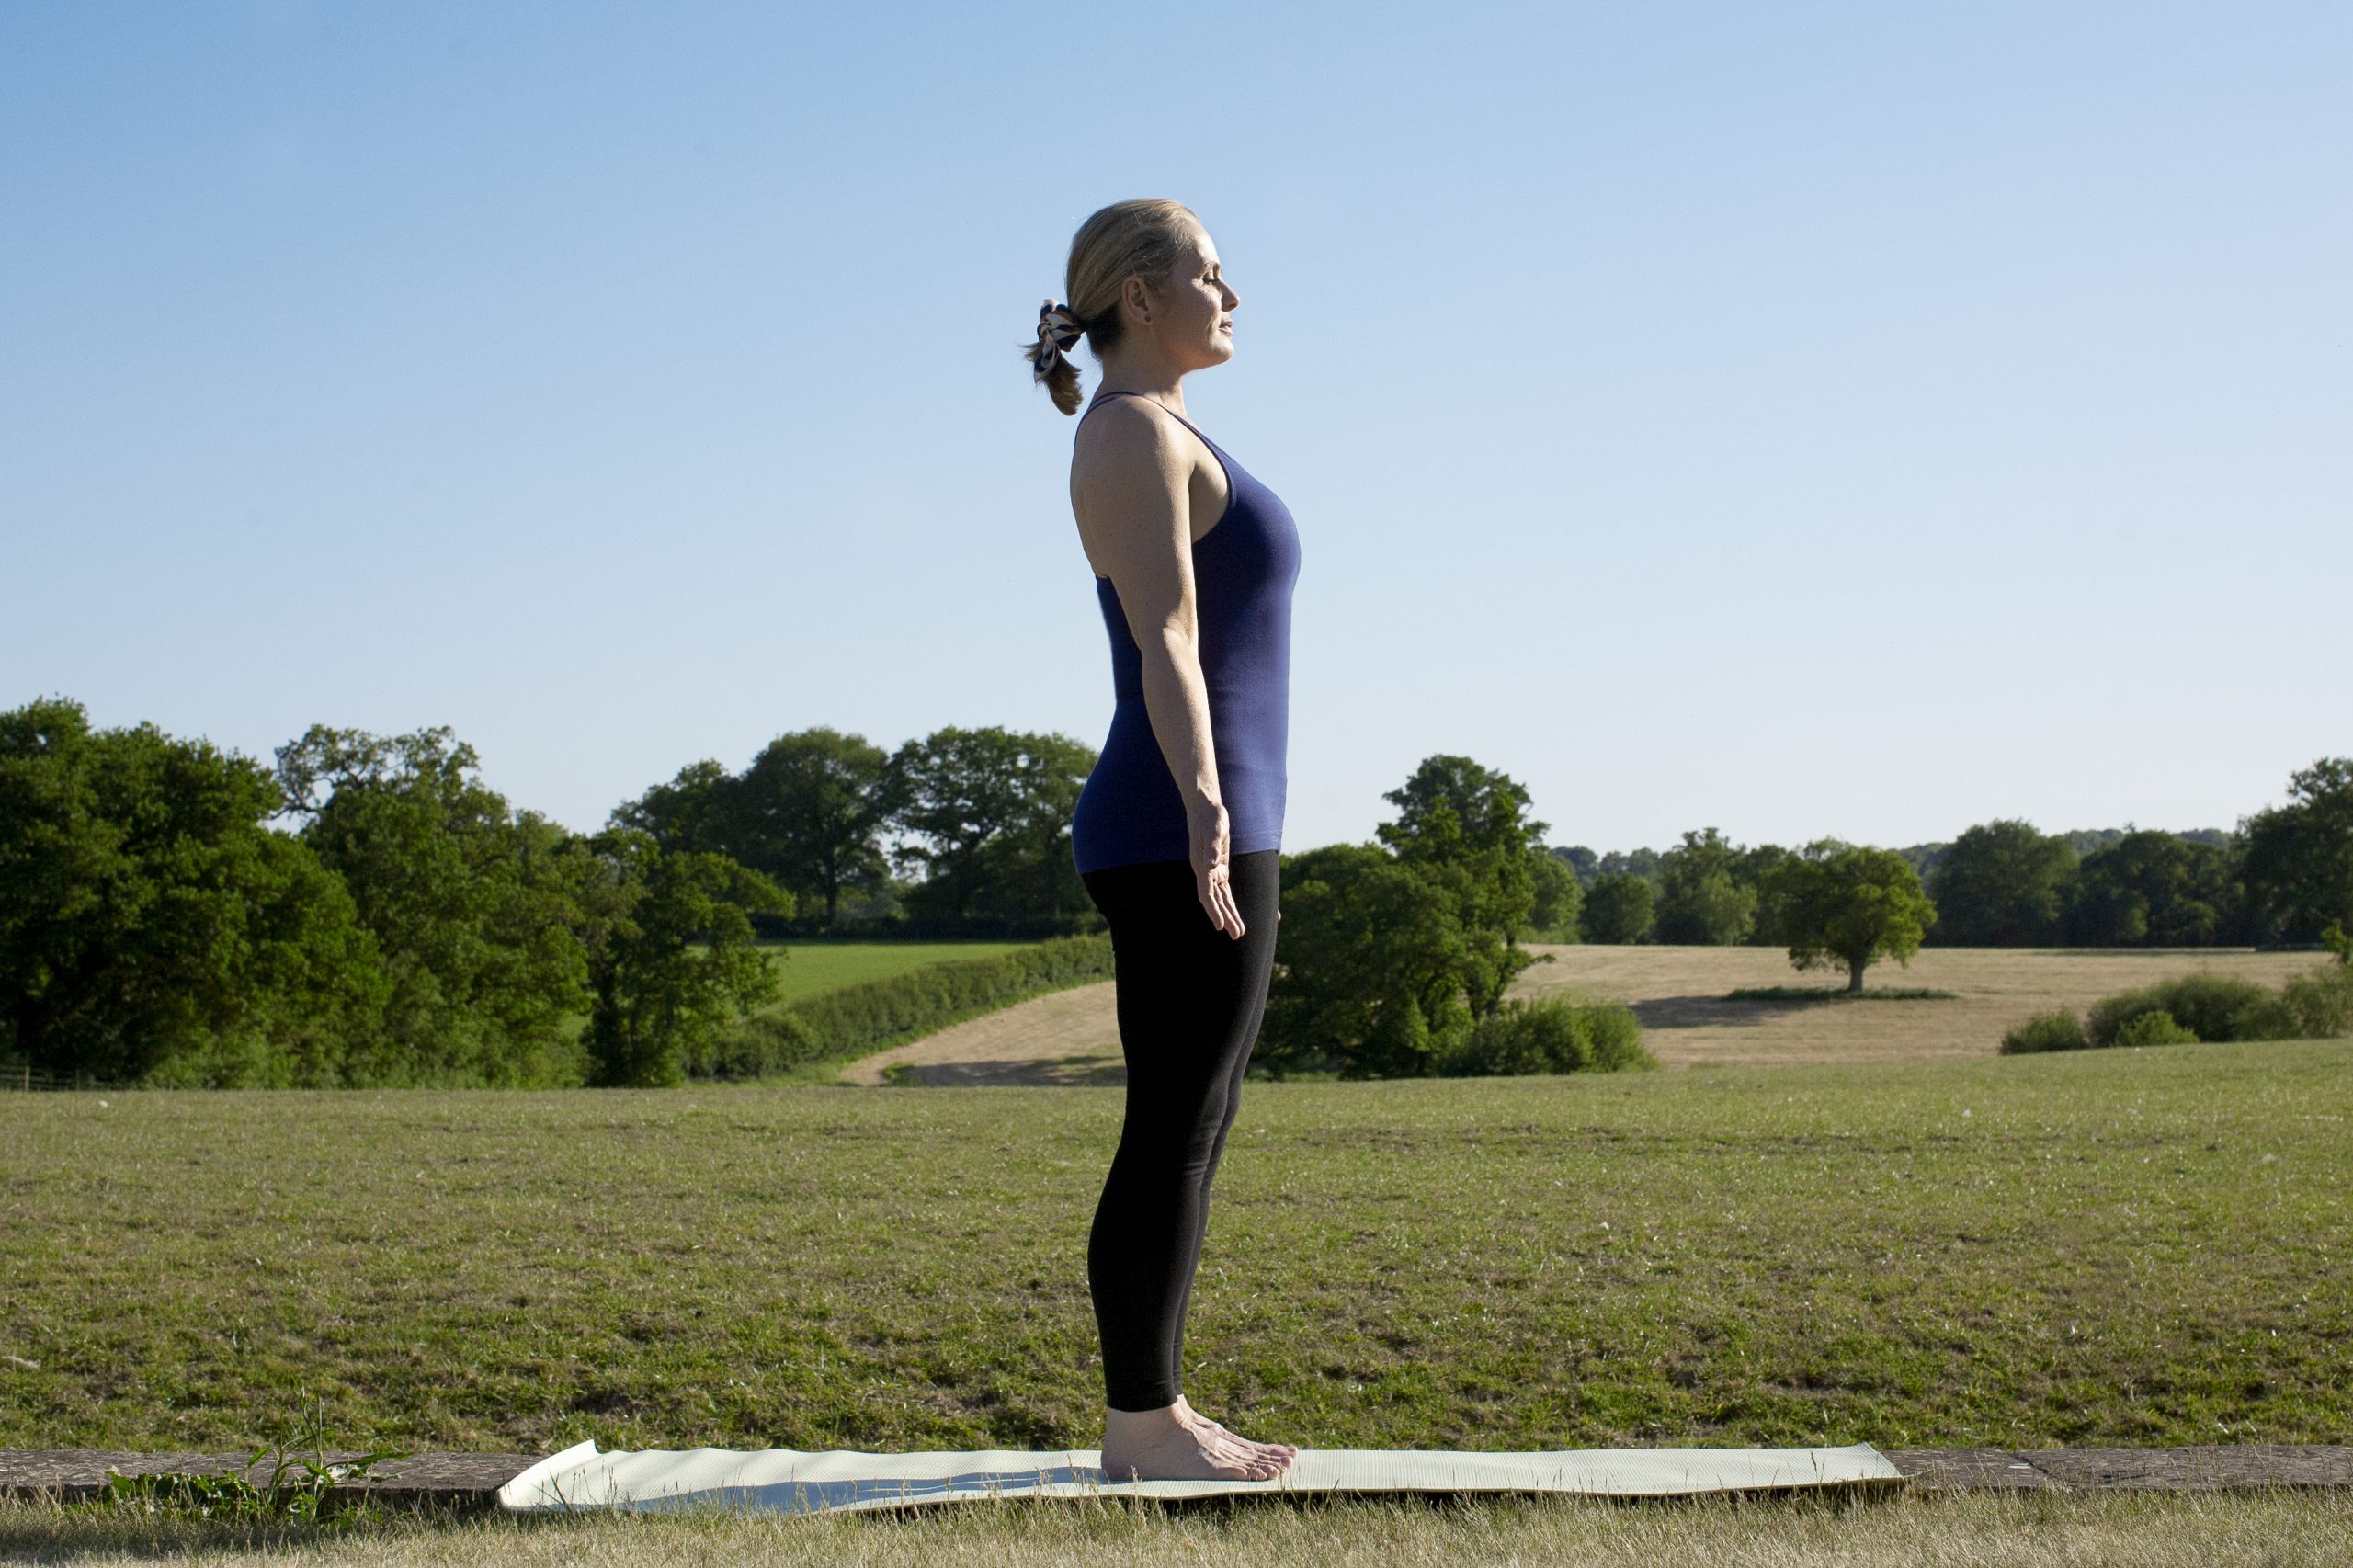
 Begin in mountain pose (Tadasana)
In the first of our standing yoga poses, begin in mountain pose. Really focus on grounding down through the feet, feeling supported by your legs and growing tall through the crown of the head.
- Stand at the top of your mat, feet either together or hip width apart (whichever you prefer).
- Centre yourself in Tadasana, focussing on grounding down into the earth and growing tall through your body.
- Inhale and exhale slowly for three to five breaths.
- If it helps to focus the mind, close your eyes.
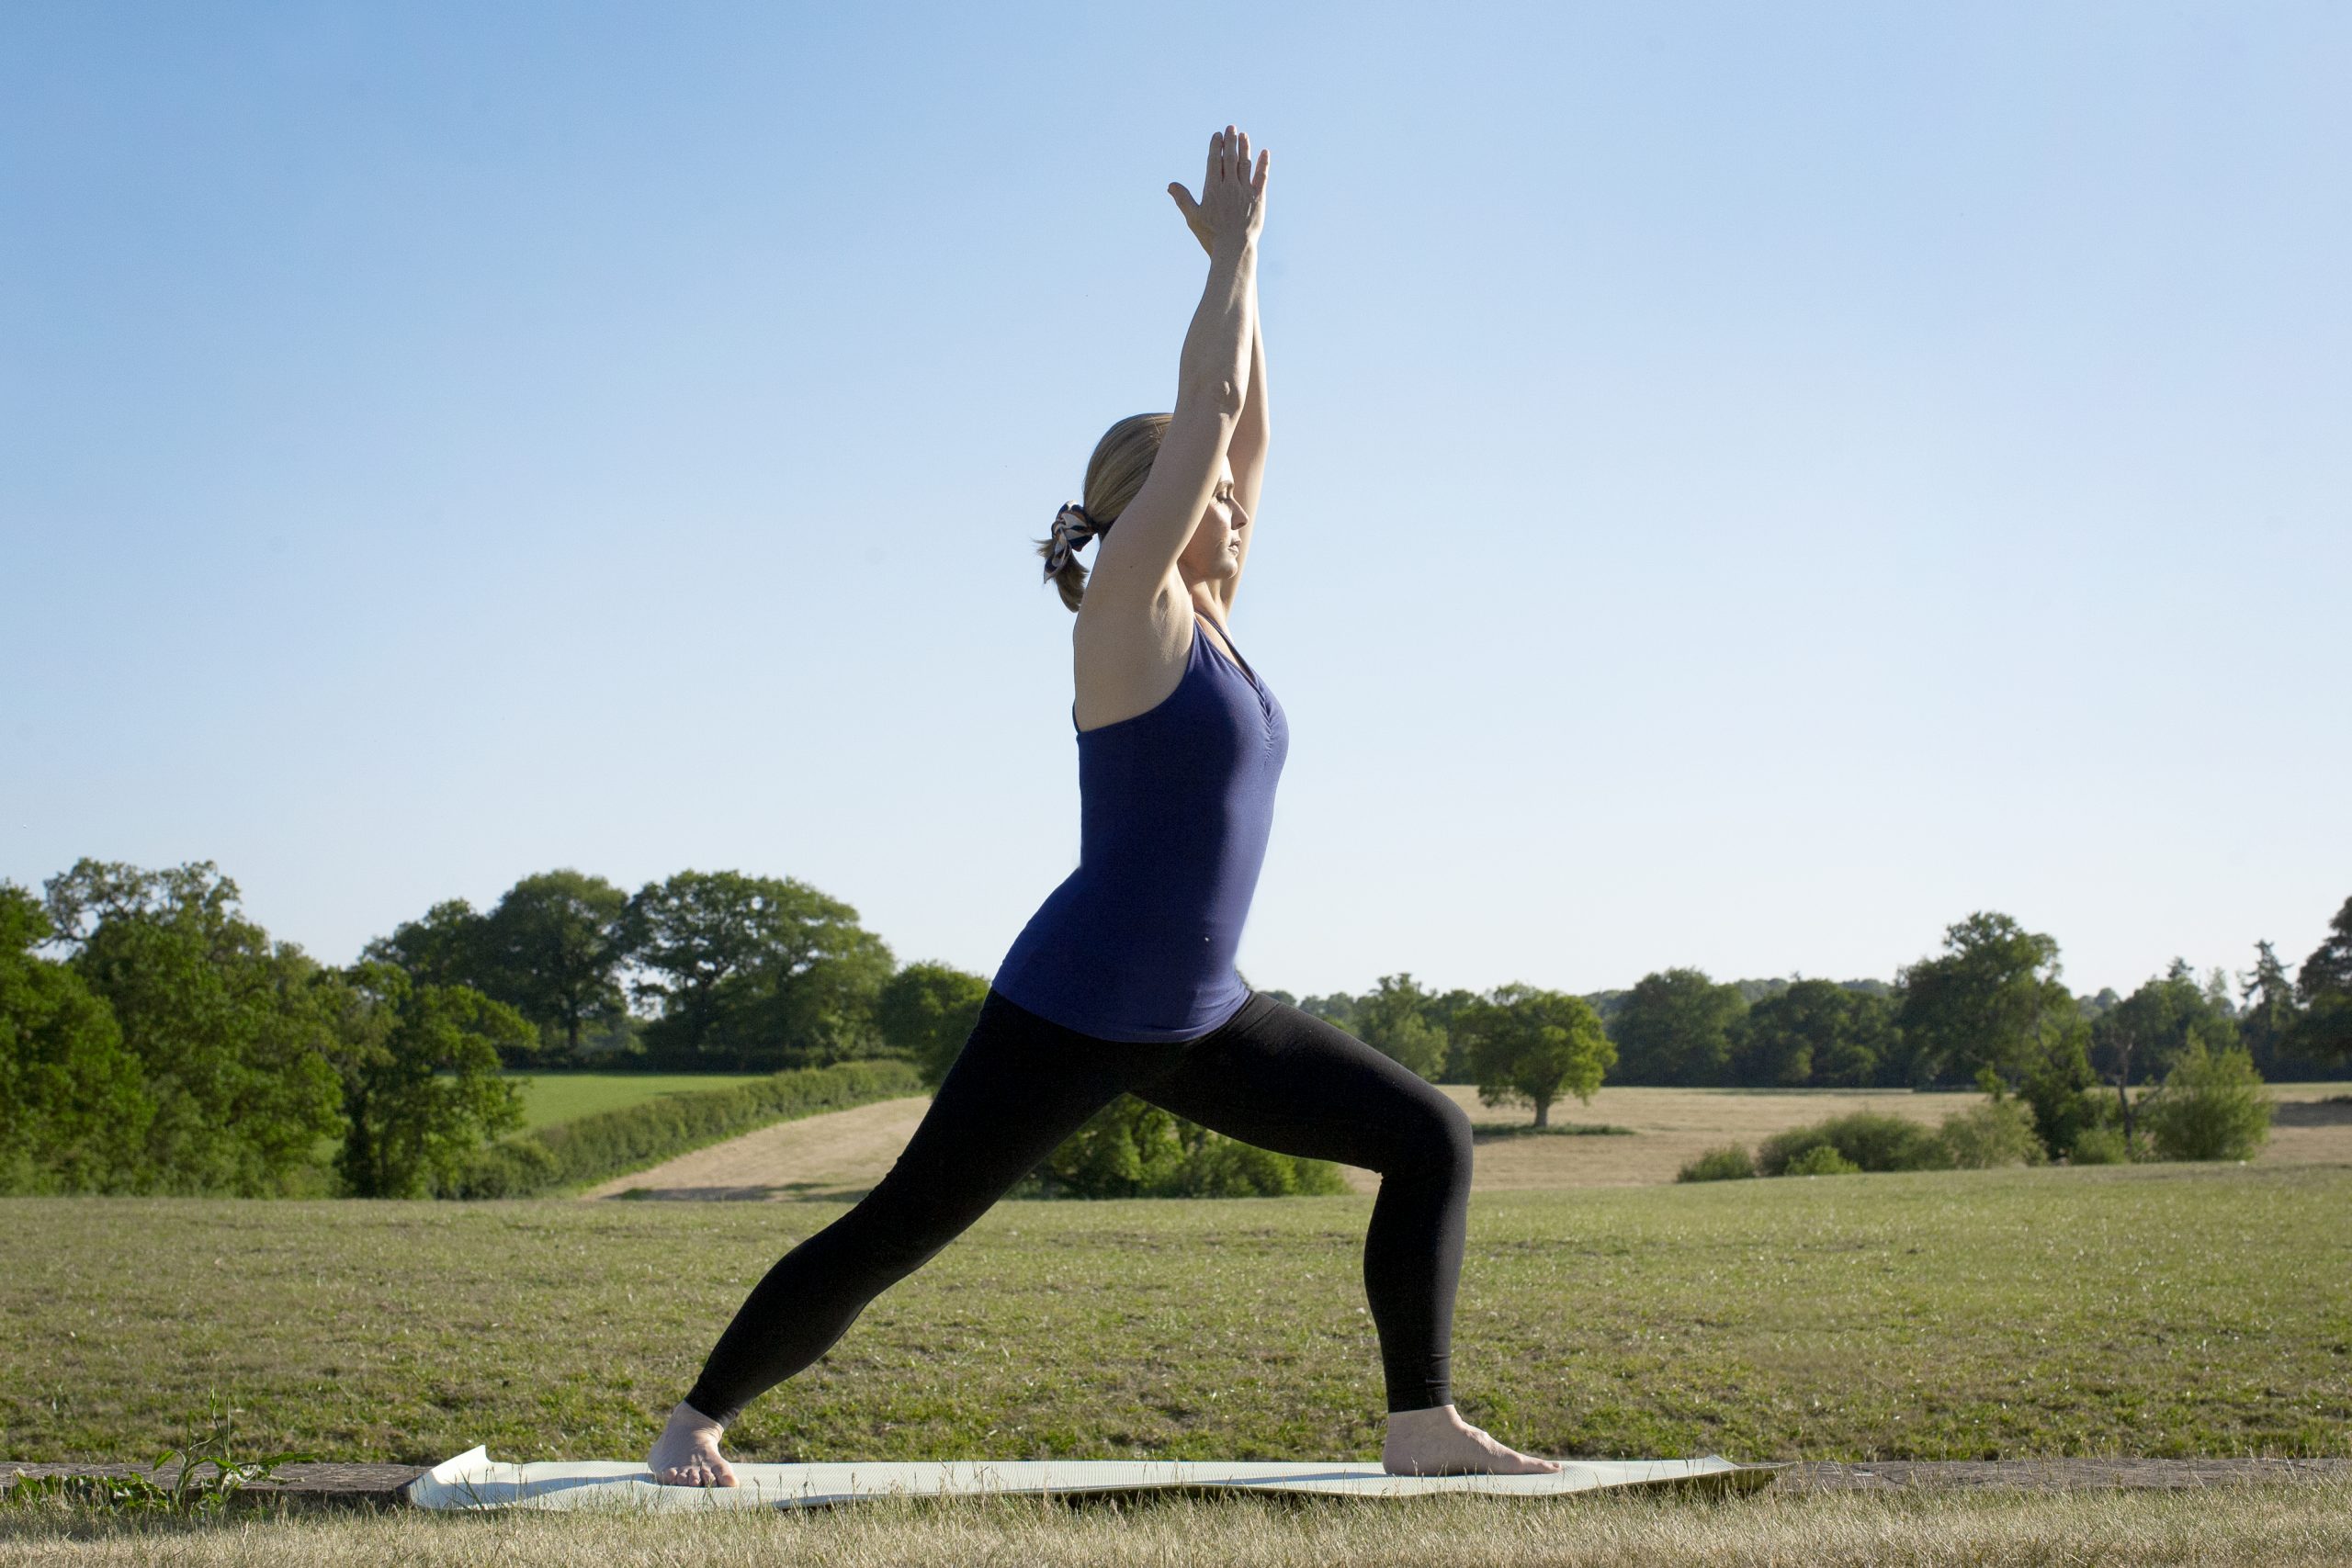
 Step back to Warrior I (Virabhadrasana I)
Virabhadrasana I is the first of our warrior poses and helps to build strength in the thighs, calves and ankles, while stretching the hips and chest. It’s a powerful pose to be in and can help to build confidence and self-esteem. Once you’ve settled into the pose, the final part of this exercises moves the arms in time with your breath. This encourages focus, while bringing openness to the chest.
If you have a shoulder injury, keep the hands on your hips, or in prayer at your chest
- From Tadasana pose, take a long step back with your right leg.
- Plant your right foot down onto the mat at a 40-degree angle. Your toes will be facing towards the long side of the mat. Keep your left toes facing forwards.
- Bend into the front leg, bringing your hips and shoulders in line with each other.
- Reach your hands to the sky.
- Take three to five breaths
- On your next exhale, begin to slowly draw the arms down and out to the sides into a cactus shape, taking care not to arch into the lower back.
- Inhale to reach the hands back up to the sky. Repeat this action another three times.
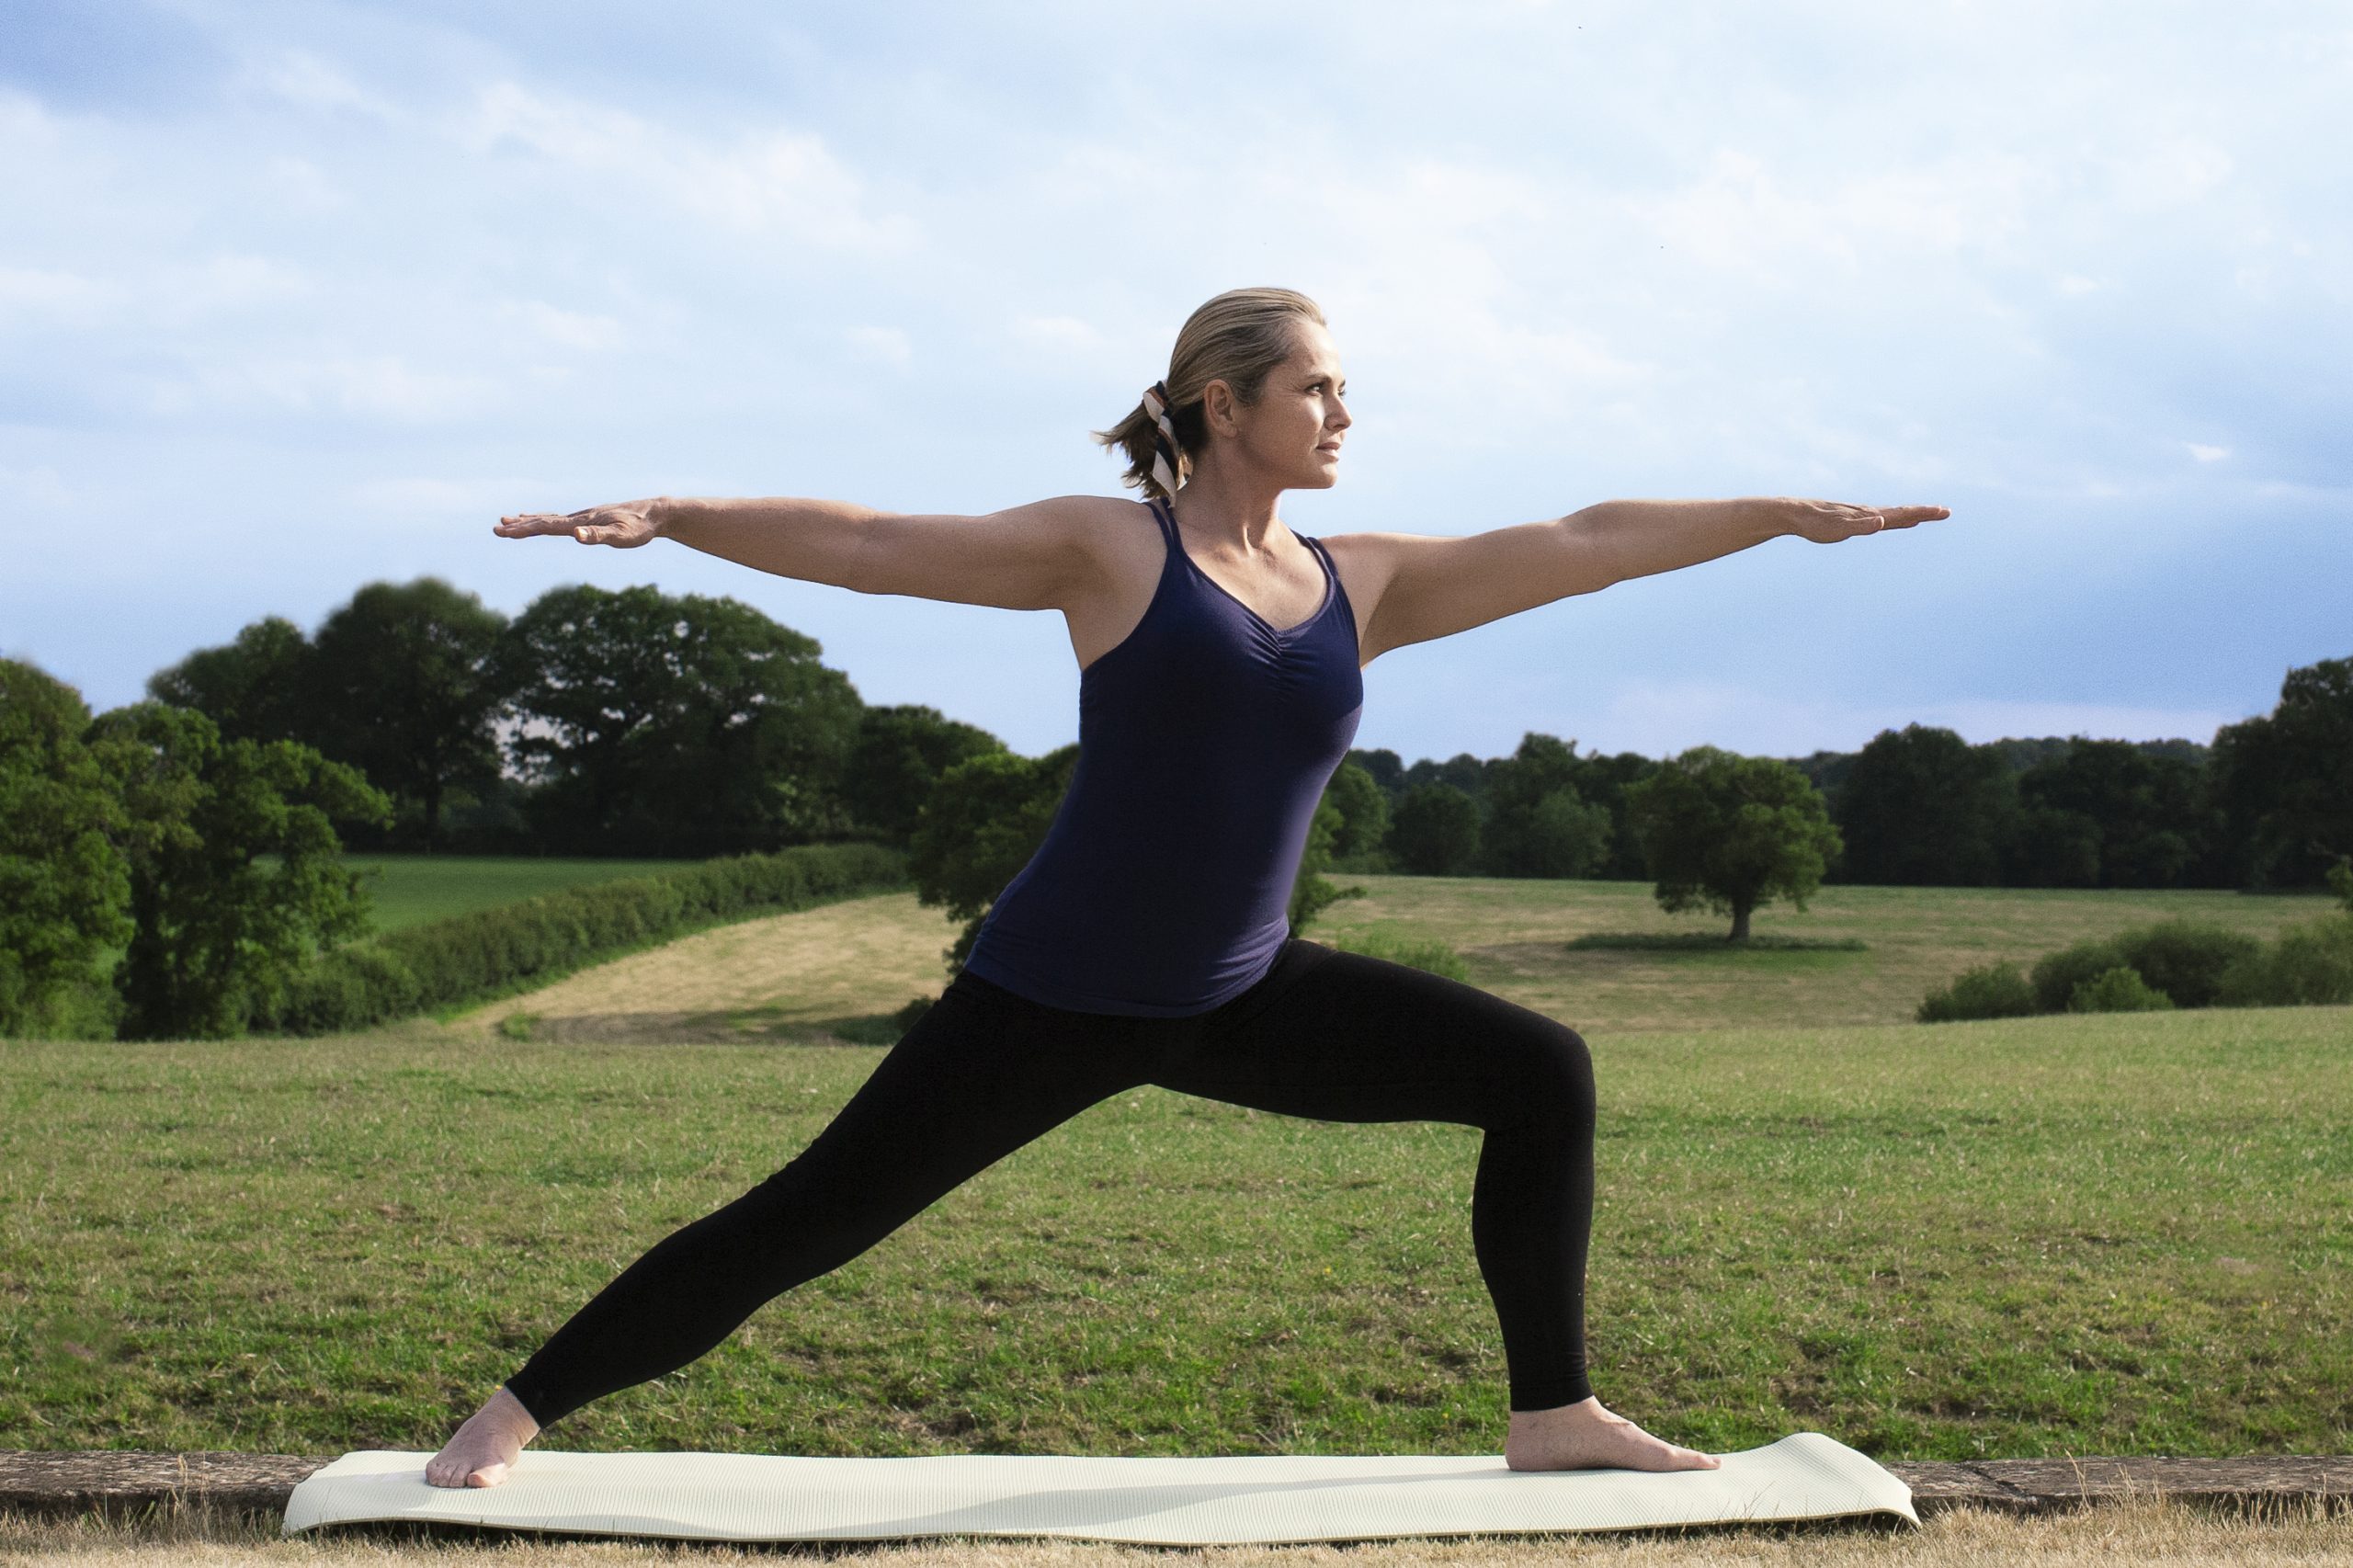 Open to Warrior II (Virabhadrasana II)
Virabhadrasana II is very similar to the previous warrior pose, the key difference being our hips and shoulders opening to face the long edge of the mat. This pose continues to build strength in the legs while grounding us down into the earth. It also brings a sense of openness to the hips and chest.
- From warrior I, open your hips, shoulders and arms out to the sides to face the long edge of your mat.
- Maintain the same position with your legs as before. Take the gaze out over your front middle finger, finding a steady gazing point.
- Inhale and exhale for three to five breaths in your warrior II, focussing on grounding down into the earth in your steady pose.
- On your next inhale, bring the palms to touch over head and straighten through the front leg.
- As your exhale, bend into the front knee once more and bring your arms back out to the sides, back into your warrior II position.
- Repeat this action another three times.
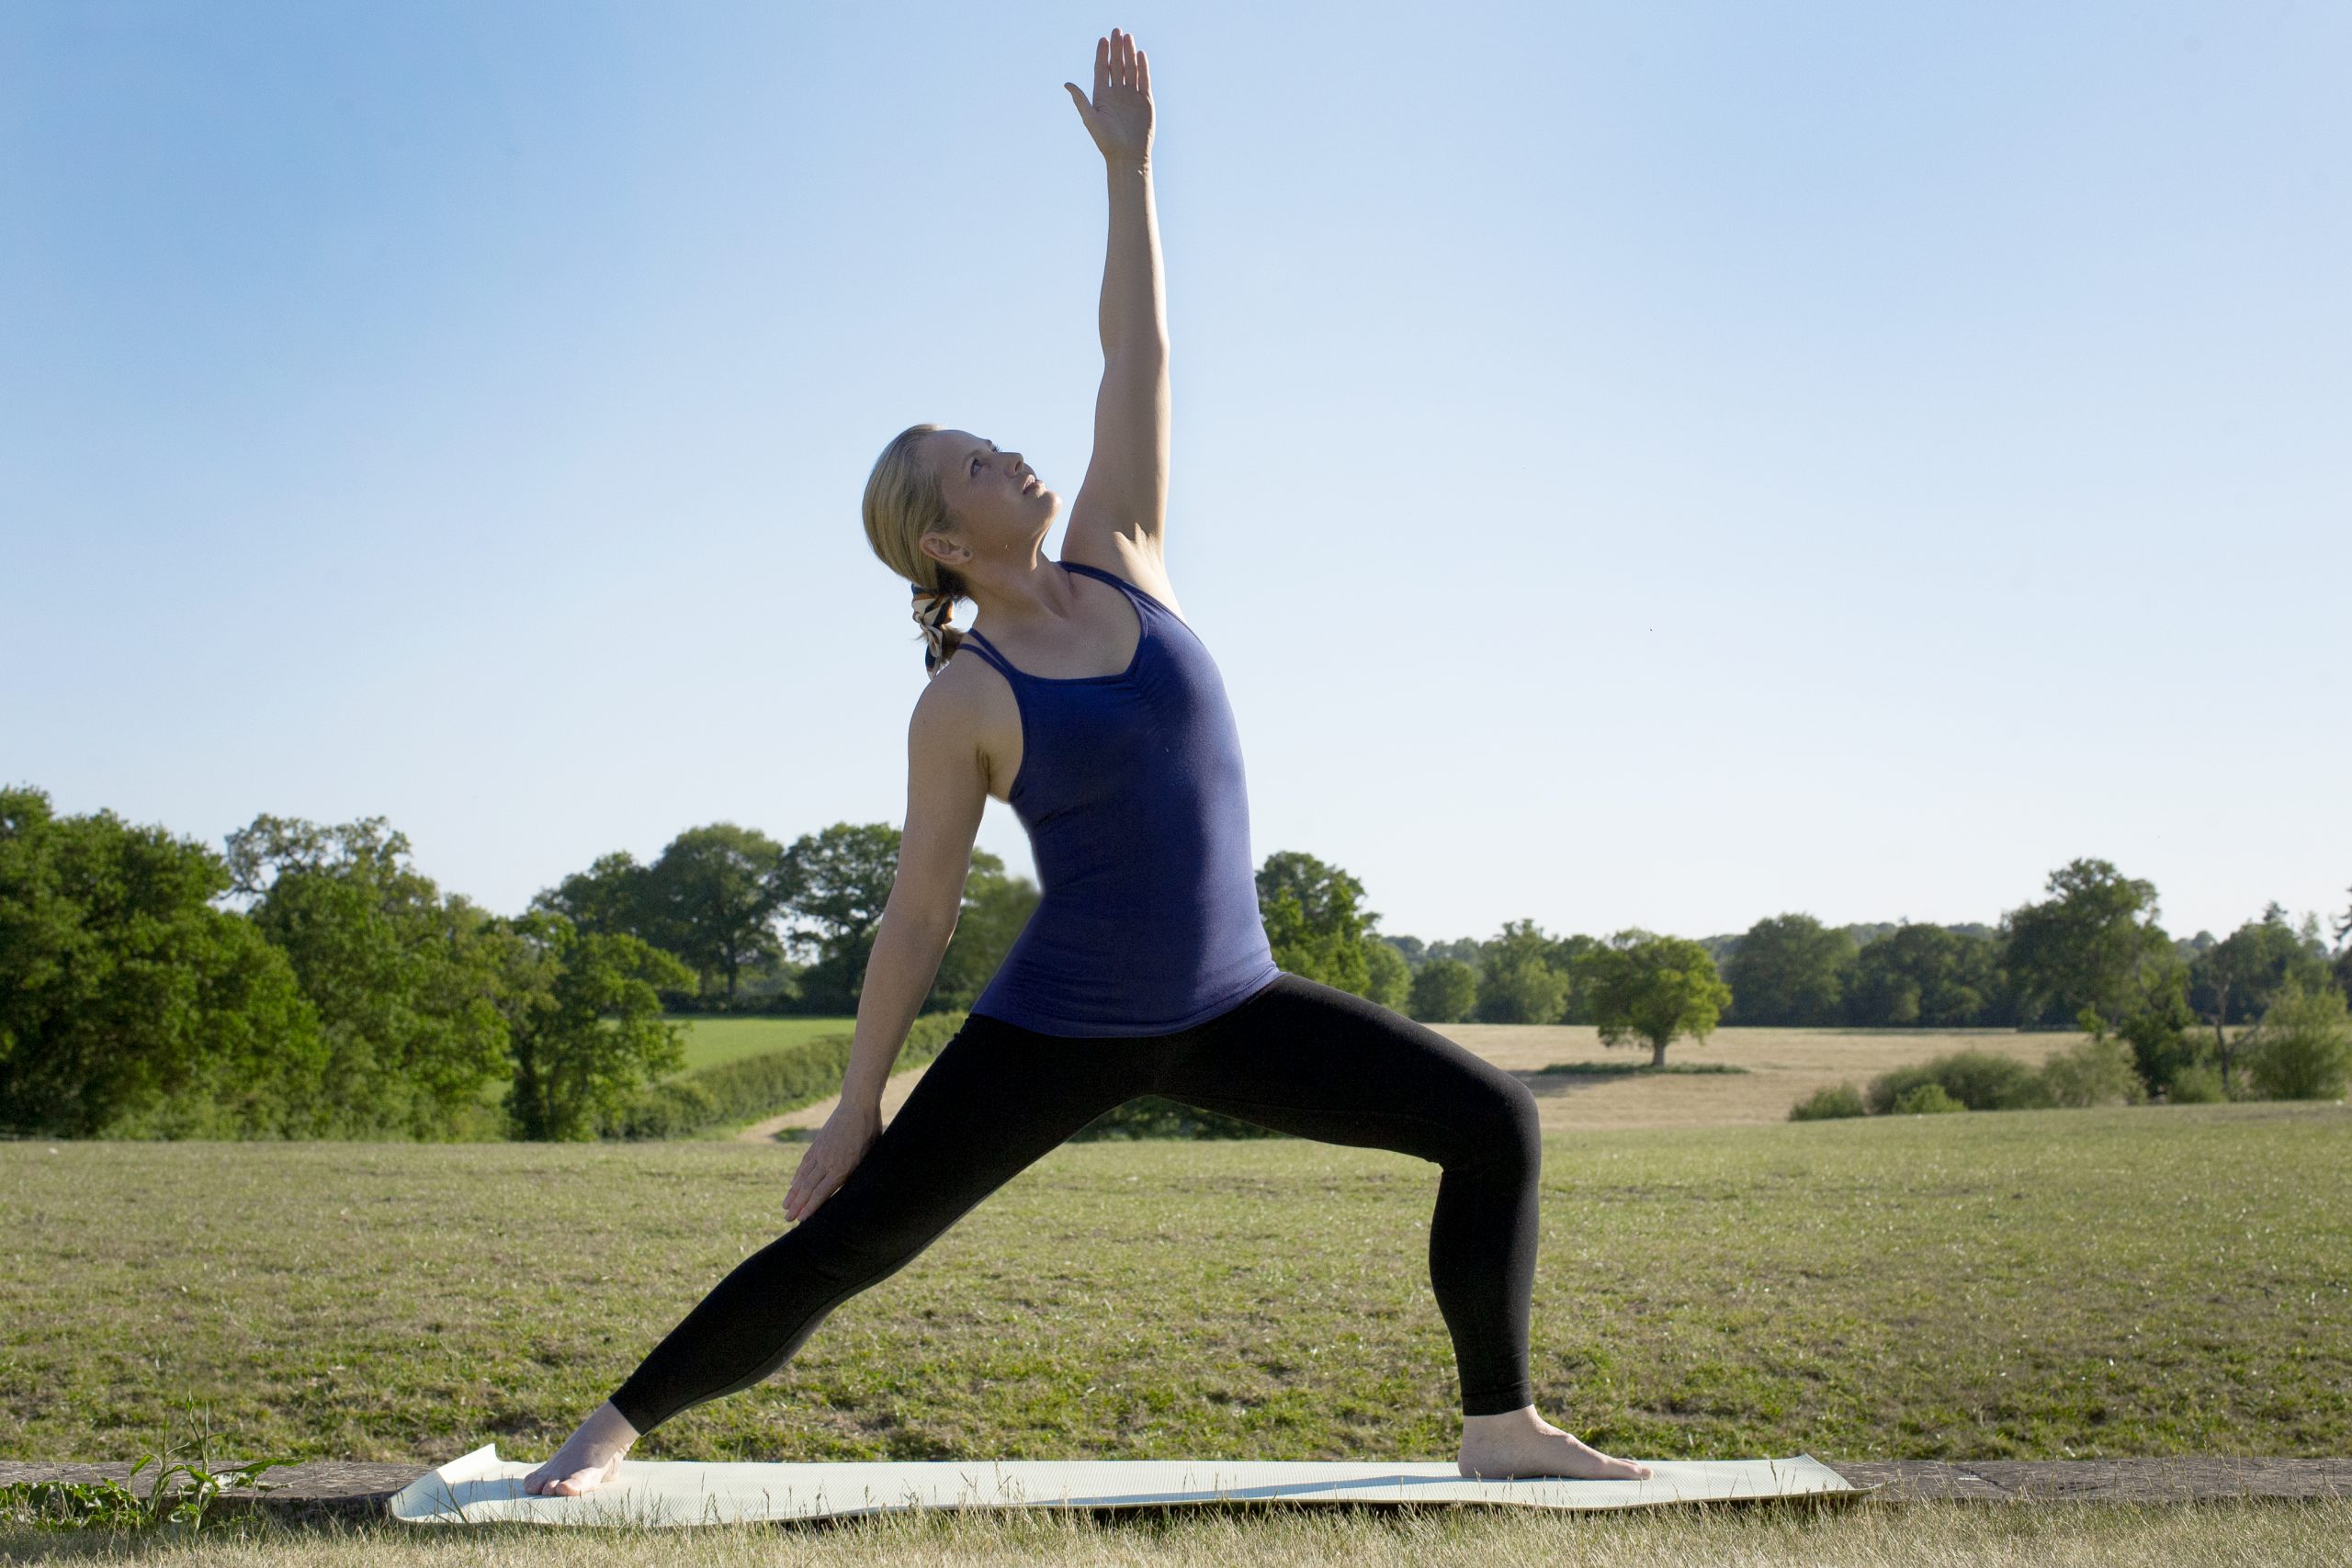 Find steadiness in reverse warrior
Now we’ve developed focus on our breath in the previous exercises, we can begin to find some steadiness. These final two standing postures will allow you to bring stillness and strength into your body. Reverse warrior helps to stretch and lengthen the side of the body, while building stamina in the legs. Keep a strong core here to protect your lower back.
- From warrior II, reach your left arm up towards the sky and gently begin to lean back.
- Bring your back arm down towards your thigh.
- Take the gaze gently upwards, finding a steady gazing point.
- Take three to five breaths here, maintaining a strong stance in your legs.
 Complete the sequence with triangle pose (Trichonasana)
Trichonasana – or triangle pose – is one of the standing yoga poses that can be a tricky one to get right, but is a fantastic way to open through the chest, promote calm and find space in the hips. Many students put too much emphasis on trying to reach the floor with their hand, but this really isn’t the goal. Instead, focus on stretching through the hips and keeping them stacked on top of one another.
- From reverse warrior, bring yourself back to your warrior II position.
- Straighten through your front leg, so both legs are straight.
- Reach through your front arm, as if you are trying to reach over a gate. Once you’ve reached as far as you can, lower your hand down towards your leg.
- Bring your hand onto your shin, ankle or foot, but ensuring that your hips remain stacked on one another. If your flexibility is limited, bring your hand onto a chair instead.
- Bring the top hand up overhead.
- Take your gaze up towards the sky, but if it bothers your neck, keep it down towards the floor.
- Inhale and exhale for three to five breaths.
- To come out of the pose, exhale and look down to the ground and use your inhale to bring yourself back up to standing.
- Heel-toe your back foot in, until you can comfortably step back to the top of your mat and repeat on the opposite side.
Read more articles like this
- Pilates exercises to try at home
- Morning meditation – a simple guide
- Yoga masterclass: Gentle sun salute